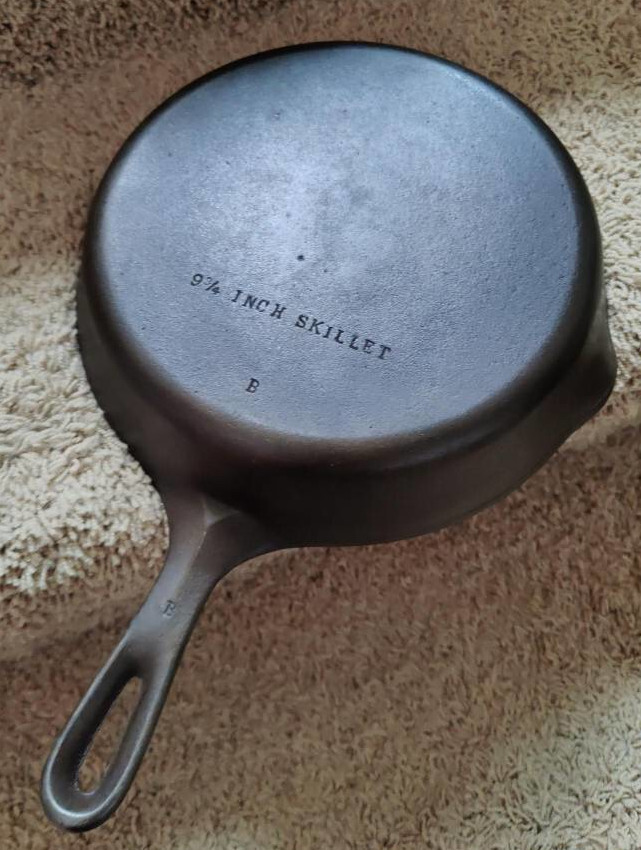
(Does this community allow posts about product restorations? I didn’t forge these skillets, but I did make them usable and appealing again.)
cross-posted from: https://sh.itjust.works/post/30170080
(long time lurker, first time poster)
A few months ago, a friend convinced me on the benefits of cast iron skillets. Having only used Teflon-coated non-stick pans, I figured it would be worth a try, if I could find one at the thrift store. Sure, I could have just bought a new Lodge skillet, but that’s too easy lol.
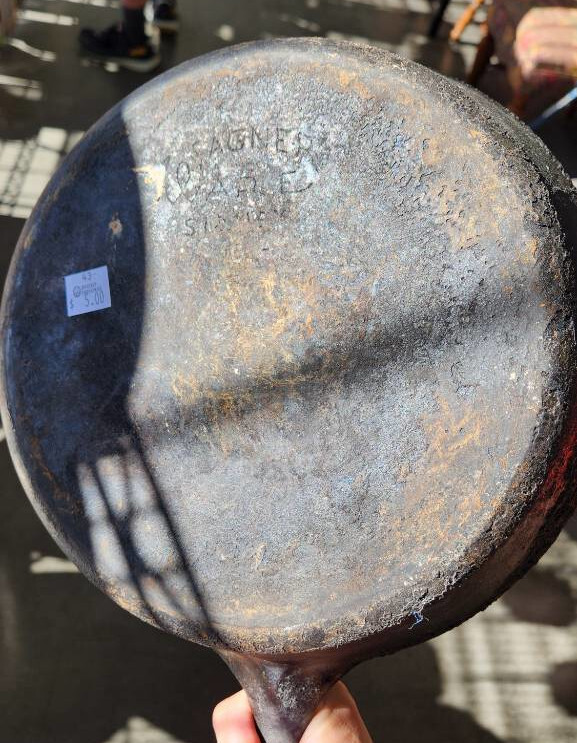
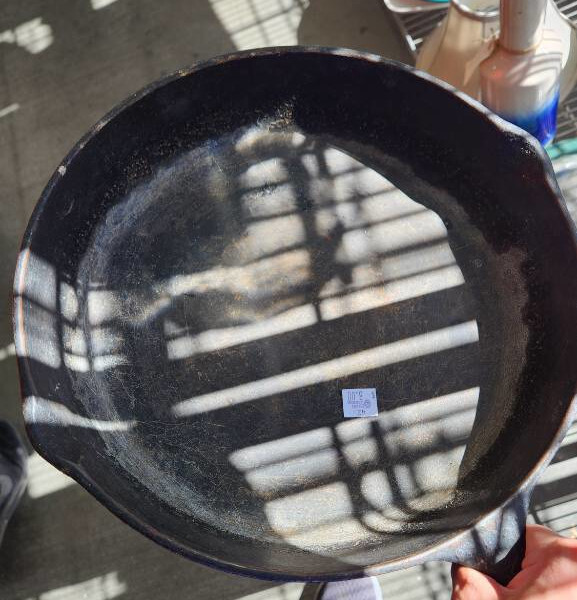
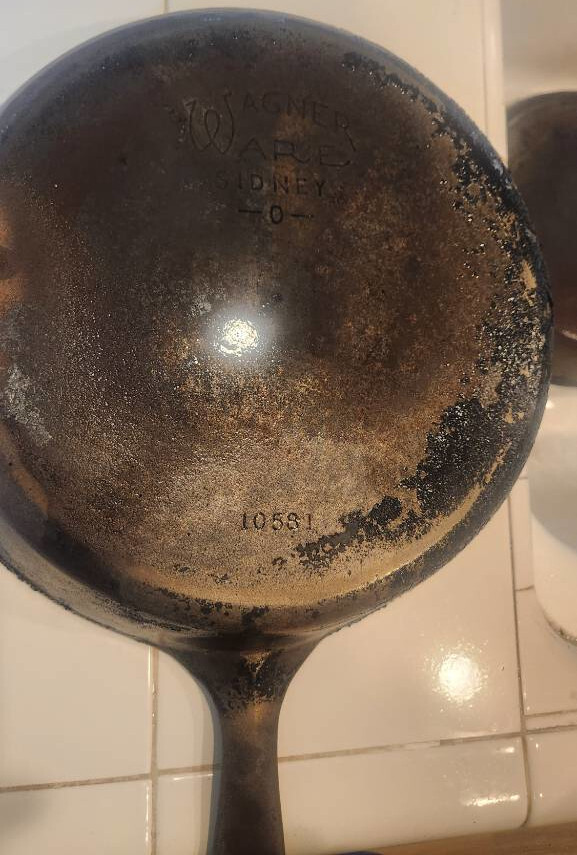
So a few weeks pass and I eventually find these two specimens at my local thrift store, for $5 and $8 respectively. It’s not entirely clear to me why the smaller skillet cost more, but it was below $10 so I didn’t complain too loudly. My cursory web searches at the store suggested that old Wagner skillets are of reasonable quality, so I took the plunge. My assumption is that the unmarked, smaller skillet is also a Wagner product.
10-inch skillet ($5) 9-inch skillet ($8) It’s very clear that both these skillets are very crusty. Initially, I tried to remove the buildup using a brass wire brush. This was only somewhat successful, so I switched to a stainless steel wire brush. That also didn’t do much, except reveal some of the inscription on the bottom.
Some research suggested I could either do an electrolysis tank, a lye bath, or try lye-based oven cleaner. For want of not over-complicating my first restoration attempt, I went with the oven cleaner method, using the instructions from this video: https://www.youtube.com/watch?v=2Pvf0m9jTeE
For both skillets, I had to apply the oven cleaner six times to finally shift all the crud, each time leaving the skillets in the garbage bag for a full day-and-a-half in the sun. In between applications, I would brush off more buildup, with the handle root and the skillet walls being the most stubborn areas. The whole process smelled terrible and hunching over the garage utility sink to brush pans is not my idea of a pleasant time.
Nevertheless, having stripped both pans, I proceeded with six rounds of seasoning with very old corn oil – it’s what was handy – at 450 F (~230 C) using my toaster oven. This happened over six days, since I wanted to use my excess daytime solar power for this endeavor. I wiped on the oil using a single blue shop towel, to avoid the issues of lint or fraying with paper towel.
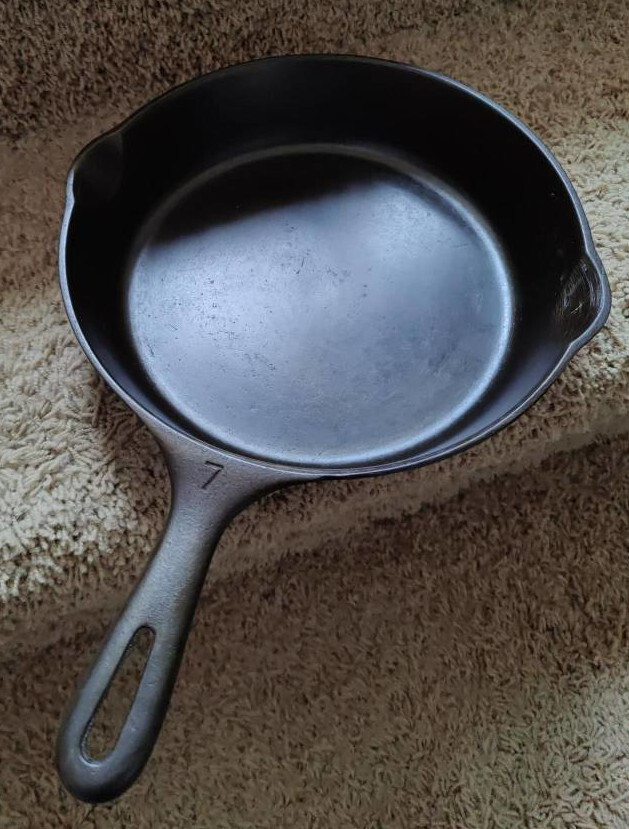
I don’t have a post-seasoning photo for the larger skillet, but here’s how the 9-inch skillet turned out. I think I did a decent job for a first attempt. And I’m thrilled that these are as non-stick as promised, with only minimal upkeep required after each use.
I got a Wagner at a thrift store and it was covered in a burnt on crust that I couldn’t even chip off with a hammer. My mom told me her grandfather used to just throw it in a bonfire and let it all burn off. After watching a video where a guy got rid of the same crust in an oven on self clean mode, I decided to go the bonfire route. I don’t have a self cleaning oven. The iron did start glowing red after a while, but once it cooled, no sign of the crust. I was amazed and now that pan acts better than most non-stick I’ve ever used.
I put a pan in my oven on self-cleaning cycle. The weight of the pan and the heat made the rack the pan was on droop permanently.
flip it upside down and repeat.
When doing research for this restoration, I did come across a suggestion about using the self cleaning feature on my oven. But some other comments suggested that self cleaning might put a lot of strain on the oven’s components, for a task which could also be achieved chemically.
So to see how my oven might behave, I set it to the highest temperature (550 F; 290 C) for 20 minutes. What happened was that the crud in the oven started smoking so badly that I had to cut the experiment short. Apparently I need to also clean my oven but I didn’t want to start a second project just to finish the first one. I’m lazy lol
So in my case, a hot oven was also a no-go. But a bonfire would have been awesome to do. For science, of course.
It was awesome. Granted the iron started glowing a soft red, so I had to remove it, but the whole process was as simple as get fire roaring, place iron, take oout of fire after some time.
How long did you have each pan in the oven for? Upside down?
For each seasoning cycle, I did the following:
- Arrange both skillets so that one edge leans on something inside the oven, so the skillets are face down but not parallel with the floor; this will drain excess oil, if any
- From cold, bring both skillets to 350 F (175 C) over 25 minutes
- Remove a skillet and wipe on/off corn oil, then return to oven. A very thin sheen of oil. Repeat with other skillet.
- Set the oven for 175 C again, but now for 10 minutes
- Remove a skillet and wipe off any pools of oil, then return to oven. Repeat with open skillet.
- Set the oven for 400 F (200 C) for 45 minutes
- When done, do not open the oven and let it cool on its own to room temperature over the next few hours
Is that how it is supposed to look when it is seasoned properly?
Mine got a lot of work to be done then
Same,
Mine does amazing eggs, but doesn’t look anything like this.
Be aware that the smooth surface also means the seasoning more easily flakes off. The sand cast texture of the pan is actually a good thing.
Looks great, awesome work OP
Wow what a glow up, that was a lot of work!
Very impressive! It looks like a brand new skillet
Thank you! One of these will be a gift, and I’m keeping the other one. My hope is that it achieves heirloom status, seeing as some online references suggest the larger skillet was manufactured sometime between 1935-1959. So just 35 more years and I can be sure it’ll be 100 years old!


